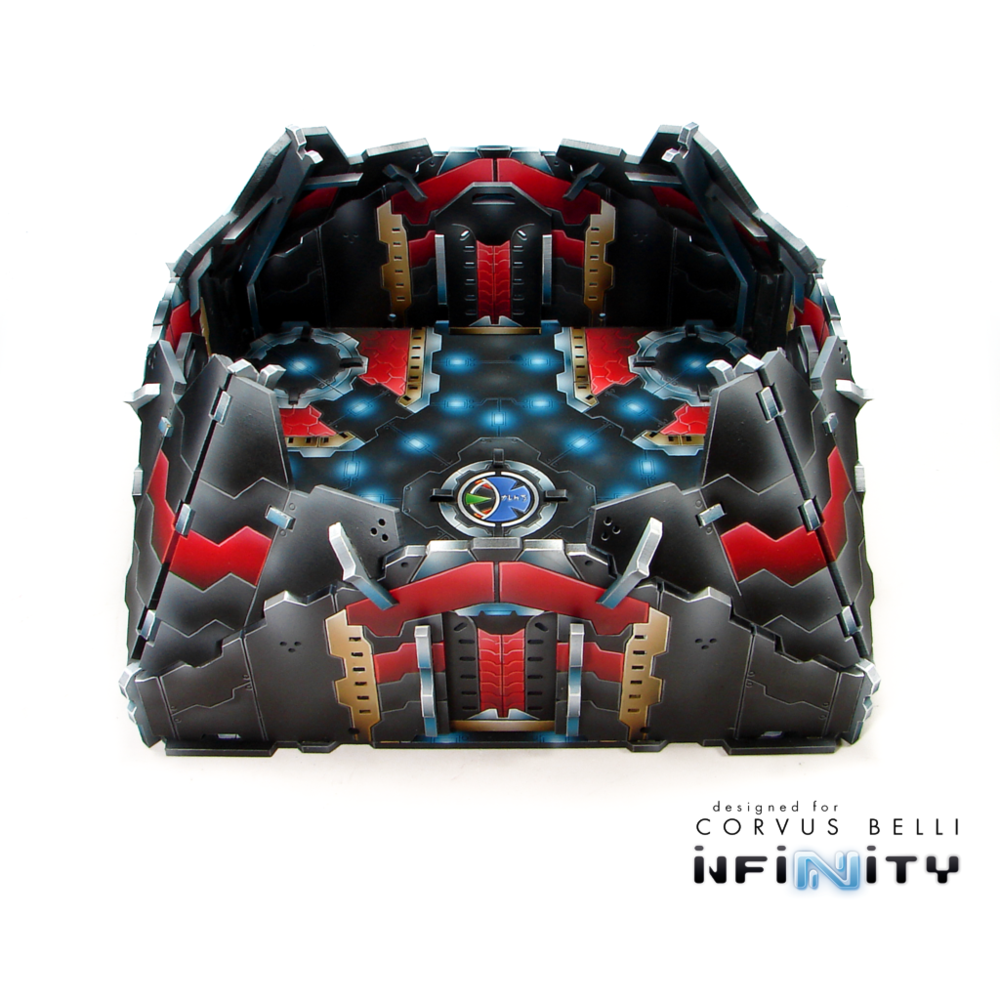
Taugak Painting Recipes
•Posted on June 09 2020


The terrain is base-coated using matt enamel. It seals the mdf and provides a good starting point. Many pieces are painted before assembly to make things easier to reach and handle.
The following paint brand abbreviations will be used throughout:
VMC: Vallejo Model Colour
VGC: Vallejo Game Colour
P3: Privateer Press P3 Paints
GW: Games Workshop
All colors are applied with an airbrush, and edge highlights are applied with a brush.
Black
- VMC Black
- VMC Black Grey (First Highlight, 80% Coverage)
- VMC Dark Grey (Second Highlight, 60% Coverage)
- VMC Neutral Grey (Third Highlight, 30% Coverage)
- VMC Light Grey (Fourth Highlight, 10% Coverage)
- VMC White (Spot Highlight)
- Touch up shadows with Black
- Edge Highlight (brush) with Neutral Grey, Light Grey, White
Red
- VMC Burnt Cadmium Red
- VMC Flat Red (First Highlight, 75% Coverage)
- VMC Black Green (Shadows, 10% Coverage)
- VMC Flat Red (75%) + VMC Sunny Skintone (25%) (Second Highlight, 30% Coverage)
- Add more Sunny Skintone to previous mix (Third Highlight, 10% Coverage)
- Add VMC Ivory to previous mix (Spot Highlight)
- Edge Highlight (brush) with 50/50 Flat Red/Sunny Skintone, Sunny Skintone, Ivory
- VGC Leather Brown (this will take 3 to 4 coats for even coverage)
- VGC Scrofulous Brown (First Highlight, 50% Coverage)
- Note: If you find this too great a transition, and get speckling or cannot achieve a smooth gradient, then mix Leather Brown and Scrofulous Brown together as an intermediate layer.
- VGC Bonewhite (Second Highlight, 20% Coverage)
- VMC Ivory (Third Highlight, 5% Coverage)
- VMC White (Spot Highlight)
- VMC Leather Brown (50%) + VMC Smoke (50%) (First Shadow, 25% Coverage)
- Add VMC Black to the previous mixture (Second Shadow, 10% Coverage)
- Edge Highlight (brush) with Scrofulous Brown, Bonewhite, Ivory, White
Silver
- VMC Dark Grey
- VMC Neutral Grey (First Highlight, 50% Coverage)
- VMC Light Grey (Second Highlight, 25% Coverage)
- VMC White (Third Highlight, 10% Coverage)
- VMC Black (Shadow, 10-25% Coverage)
- VMC Blue Green (80%) + VMC Dark Prussian Blue (10%) (Added very thinly to "tone" the metal in places)
- Edge Highlight (brush) with Neutral Grey, Light Grey, White
Blue "LEDs"
These colors are sprayed not just onto the lights, but are also over-sprayed onto the surrounding areas in successively smaller circles to simulate the glow of the light.
- VMC Turquoise (Full)
- VMC Blue Green (80%)
- VMC Deep Sky Blue (60%)
- VMC Sky Blue (40%)
- VGC Glacier Blue (20%)
- VMC White (5%)
- Edge Highlight (brush) the adjacent panel lines with Sky Blue, Glacier Blue, White (to simulate light catching the nearby edges). The brightest highlights should be closest to the light source. Edge Highlight the lights themselves with Glacier Blue, White.
Red "LEDs"
These colors are sprayed not just onto the lights, but are also over-sprayed onto the surrounding areas in successively smaller circles to simulate the glow of the light.
- VMC Burnt Cadmium Red (Full)
- VMC Flat Red (80%)
- VGC Hot Orange (60%)
- VMC Light Orange (40%)
- VMC Flat Yellow (20%)
- VMC Ice Yellow (5%)
- Edge Highlight (brush) the adjacent panel lines with Light Orange, Flat Yellow, Ice Yellow (to simulate light catching the nearby edges). The brightest highlights should be closest to the light source. Edge Highlight the lights themselves with Flat Yellow, Ice Yellow.
There you have it! We'd love to see your painted versions of Warsenal Taugak Trenchworks terrain!

Comments
0 Comments
Leave a Comment