Painting Tutorial - Ord Buhkep pt.3
•Posted on February 04 2020
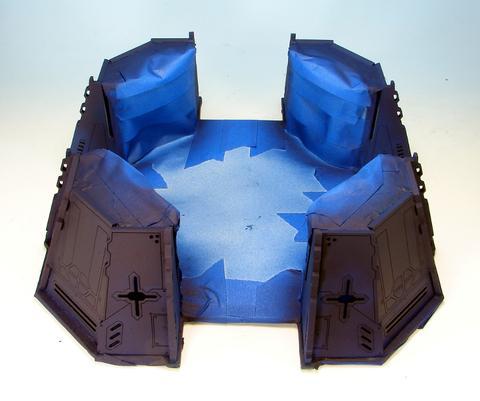
The main color of the Ord Buhkep will be a nice, vibrant blue. If you missed the previous steps, you can see how the metal parts were painted here, and the how the white elements were painted here.
Step 1
The exterior of the building is given a base coat of Vallejo Model Colour (VMC) Dark Prussian Blue 050. Because of the white overspray from the previous step, this may take several coats to get an even, opaque base coat. Make sure that each coat dried before re-spraying, or else the paint can pool and drip. Use a hairdryer to help speed up the process.

Step 2
Airbrush with Privateer Press Paints (P3) Cygnar Blue Base. Leave some of the Dark Prussian Blue from the previous step showing at the bottom for shading. This is the main color, so you want a nice, smooth, opaque finish.

Step 3
Highlight using the airbrush with P3 Cygnar Blue Highlight. The P3 paints do not need to be thinned quite as much as other hobby paints. A milk-like consistency is perfect. Again, leave some of the previous colors showing through to stay in shadow as you build the highlights toward the top edges of the building.

Step 4
Mix P3 Cygnar Blue Highlight with Vallejo Game Colour (VGC) Glacier Blue to get a color that is halfway between the two. Try starting with a 50/50 mix and adjust adding either more Cygnar Highlight or more Glacier Blue as needed to get the correct value that is halfway between the two. Remember, even different batches of the same paints will sometimes behave differently, with different levels of pigment.
Airbrush further highlights with this mixture.

Step 5
Airbrush more highlights, toward the top edges of the building, with VGC Glacier Blue. Holding the building so that the spray comes from "above" helps.

Step 6
Final airbrushed highlights are applied sparingly with White. The white helps the surface look shiny and chrome™.

Step 7
This is the most time-consuming step, but really takes the building to the next level.
Using a fine-tipped brush, paint edge highlights along the edges of each panel line and groove. Take a minute to think about sunlight coming from above, and how the light would catch along the top edges of the detail, but not necessarily along the bottom edges. Use VGC Glacier Blue with a little P3 Cygnar Blue Base mixed in to paint most of the highlights. Use pure white for the highest highlights in the lighter edges near the top.
For the hard edges and angles of the building, use the flat of the brush (instead of the tip) at a 45-degree angle to the edge to just pick out the sharpest edge. It's a great trick for getting nice sharp details picked out without needing herculean motor control.

Step 8
Now that the blue is all finished, you can go ahead and remove all the masking tape and masking fluid. Use a pencil eraser to get the Liquid Mask areas to start coming up, and then you can grab them with a tweezers to pull them off. You may need to touch-up some areas with a brush if any of your masking has sprung a leak during the painting process.

Almost done! In the final installment of this tutorial, we will finish off with some final detailing and varnishing.
Comments
0 Comments
Leave a Comment