Painting Tutorial - Comanche Emplacements pt.2
•Posted on February 05 2020
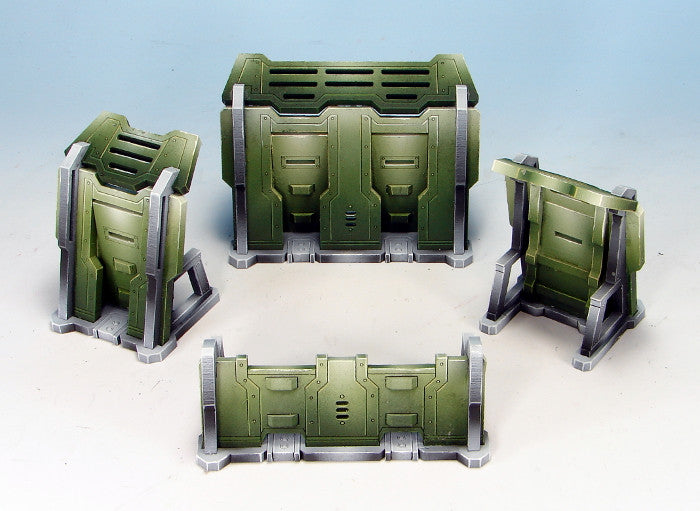
Continuing our tutorial on painting the Comanche Emplacements for Infinity: The Game, Part Two will cover painting the green armor plates. If you missed out on Part One, painting the steel pieces, you can check it out here.
After priming with black spray enamel, the pieces are base-coated using an airbrush with Vallejo Model Colour 086 Luftwaffe Camo Green.

First highlights are airbrushed with VMC 081 Medium Olive. Spray from the direction of the sun, covering less and less area with each successive highlight. Notice that the short emplacement wall attaches to the painting handle in the opposite direction from the other pieces, so keep track of which end is up.
So that you don't spill the paint out of the cup, keep the airbrush level, and turn the pieces in your other hand to spray from the tops!

Next, add VMC 079 Golden Olive to the previous color to add further highlights.

Add VMC 020 Sunny Skin Tone to the previous mix for the next highlight.

Continuing with the same mix, this time add in VMC 005 Ivory.

The final airbrushed highlight is pure VMC 005 Ivory.

Add in shadows by airbrushing VMC 089 Military Green to the lower portions.

Finally, add a drop of VMC 086 Luftwaffe Camo Green and a drop of VMC 005 Ivory to some VMC 079 Golden Olive and use a paint brush to apply highlights to the edges and panel lines. Add more Ivory, and use pure Ivory, to highlight the highest edges at the tops, as the pieces get lighter.

With the green finished, we can now assemble the Emplacements using white glue, super glue, or my favorite - Alene's Tacky Glue (you can find this in the crafts department; it's the brown bottle with the white top).

At this stage, the Emplacements could be considered complete. However, once the glue completely dries we will add some weathering to them so that they are not so "factory fresh." That will be covered in the third and final instalment of this tutorial.
Comments
0 Comments
Leave a Comment