Painting Bladerunner Inspired Grungy Cyberpunk
•Posted on April 06 2020
Xiguan Shop by Gianni Rossi
Step 1 – Priming

Thin coats of Stylnylrez primer. I also coat the bottoms and insides of parts that will not be visible for 2 reasons:
1) it looks better when people are handling your terrain to have a finished look on the bottom.
2) the primer on both sides will help prevent warping from moisture, paint, and solvents used in the weathering process.
Step 2 – Paint metal parts

Using Decayed Metal from Scale Colour, thinned with Acrylic Thinner, I spray all the metal sections.
Step 3 – Masking

I cover the whole section I am painting with frisket film, and then I cut out protections for the parts already painted metal.
Step 4 – Painting the Cement

Using thin coats of Minitaire Base Grey, I paint the outside of each sidewalk section, following the laser engraved lines.
Then using thin coats of Minitaire Earth, I paint the interior of each sidewalk section. The idea is to create a mottled texture that is not even (it will even out with weathering.
Step 5 – Applying Chipping Medium

The goal in this step is to help flake off the traffic markings I will apply (No Parking zones, Stop areas, etc.) On this model, I sprayed the curb with Vallejo Chipping Medium.
Step 6 – Painting Traffic Markings

Using Scale 75 Tenere Yellow, I spray a few light coats on the sections I have masked-off. (Prior to this, I remasked the whole sidewalk, leaving only these sections exposed.
Step 7 – Chipping

Using an old brush cut specifically for this purpose and a spare toothbrush (here is one of my dogs’ spare brushes they refuse to let me use on them) I wet the area with water and then rub off some of the paint, revealing the sidewalk colour beneath the yellow paint.
Step 8 – Painting the Walls

Using Abyssal Blue from Scale 75, I apply a few thin coats to the walls of the building. In this photo, I have already painted and masked off all the steel sections, which were painted with Black Metal from Scale 75.
Step 9 – Prepping to Chip the Walls

At this point, as the thin coats of paint are not very tough, so I hit them with a coat of Windsor and Newton Galeria Matt Varnish (which is more satin than matt). This is the varnish I use for all my terrain, because it works really well, airbrushes exceedingly well, and cleans up quickly. In addition, as it has a sheen to it, it makes weathering easier.
Once the varnish is dry (sped up with a trusty hair drier) I sprayed the walls with Vallejo chipping medium.
Step 10 – Painting the Walls

I wanted to have a fade effect from light to dark orange on the walls, before I chipped them back, so I first airbrushed Scale 75 Orange Leather all over the piece, and then airbrushed Scale 75 Golden Skin from the top of the wall fading to the base. The picture washes this effect out, but you can slightly see it.
Step 11 – Chipping

I remove all the frisket mask, and using the old brush and tooth brush, chip the paint, revealing the blue undercoat.
Step 12 – Back Walls Chipping Prep

For the taller side and rear walls, which include part of the parapet (lol I know) I prepped with contrasting base coats, as the top coats would be contrasting. Followed the same process as above.
Step 13 – Chipped Walls and Painted Details

As previously, I chipped the walls, exposing the under paint. Unintentionally the blue parapets came very close to the blue underpaint on the beige areas.
I then painted by brush the metal details using Black Metal and the wires, first painting with Inktense White from Scale Colour and then Antares Red from Scale Colour. This makes the red pop and covers the paint chip effect under the red wires.
Step 14 – Prepping Weathering

For all my terrain, and my military models, I use oil based paints for streaking and weathering. To prep the paint for this, you need to bleed out some of the linseed oil that the pigments are mixed with. To do this, I put dollops of the oil paint on my professional pallet, the top of a corrugated cardboard shoebox, which will wick away the linseed. (Note the wet spots around each paint dollop, that is linseed oil).
Step 15 – Mold and green growth


I applied Olive Green paint to the base of the building, where it connects to the sidewalk. I did this all along the building.
Then using a flat brush dipped in turpentine, I wipe up from the base of the building. Note from left to right, green paint applied, then wiped up, then feathered in using increasingly more and more turpentine.
The goal is for the moldy colour to fade into nothingness away from the sidewalk.
Step 16 – Prepping Filtering

In this step, I “randomly” apply dots of different colour paint all over the model. This process is used a lot in military models and is called Dot Filtering.
Step 17 – Filtering

Again, taking a flat brush loaded with turpentine, and starting from the top of the model, make long, straight strokes from the top to the bottom. This will activate the paint dots and have them start streaking. In the photo, you can see the paint starting to streak and be very stark in contrast to the building. After subsequent passes with the brush, the filtering effect should be quite subtle. It is too subtle; you can always add more paint and repeat the process. There is not a magic number of passes or wipes to do here. You stop when it looks/feels good. Only you can know where to stop. The idea is to weather the building with dirt, rust, and atmospheric pollutants, all brought down by rain.
Step 18 – Weathering the Roof

I did the same dot filtering as the walls above (already completed in this photo) and then I did some stipple filtering. Adding blotches of white paint to the roof, I stipple them until they blend with the roof, providing off colouration.
Step 19 – Applying Pigments

Unfortunately, it was getting late and I forgot to take photos as I did this step. Essentially, I add pigments where I think they make sense. Natural Umber and Natural Iron Oxide are my colours for urban dirty and a dust them all over, using a cheap blush brush from the pharmacy’s makeup section. The Dark Red Ochre and Oxide colours are my rust effects that are placed on and beneath metal details (like fans and exhaust). Finally, Dark Steel pigment is the secret weapon that I apply to metal parts like sewers and grating, to give them a dark metal sheen (kind of like the lead in a pencil.) Next time you are outside, look at sewer or manhole cover, they are rusted, but this dark brown/black metal with a sheen. This pigment adds that metallic sheen. I finally stick everything with the Pigment binder blown through an airbrush.
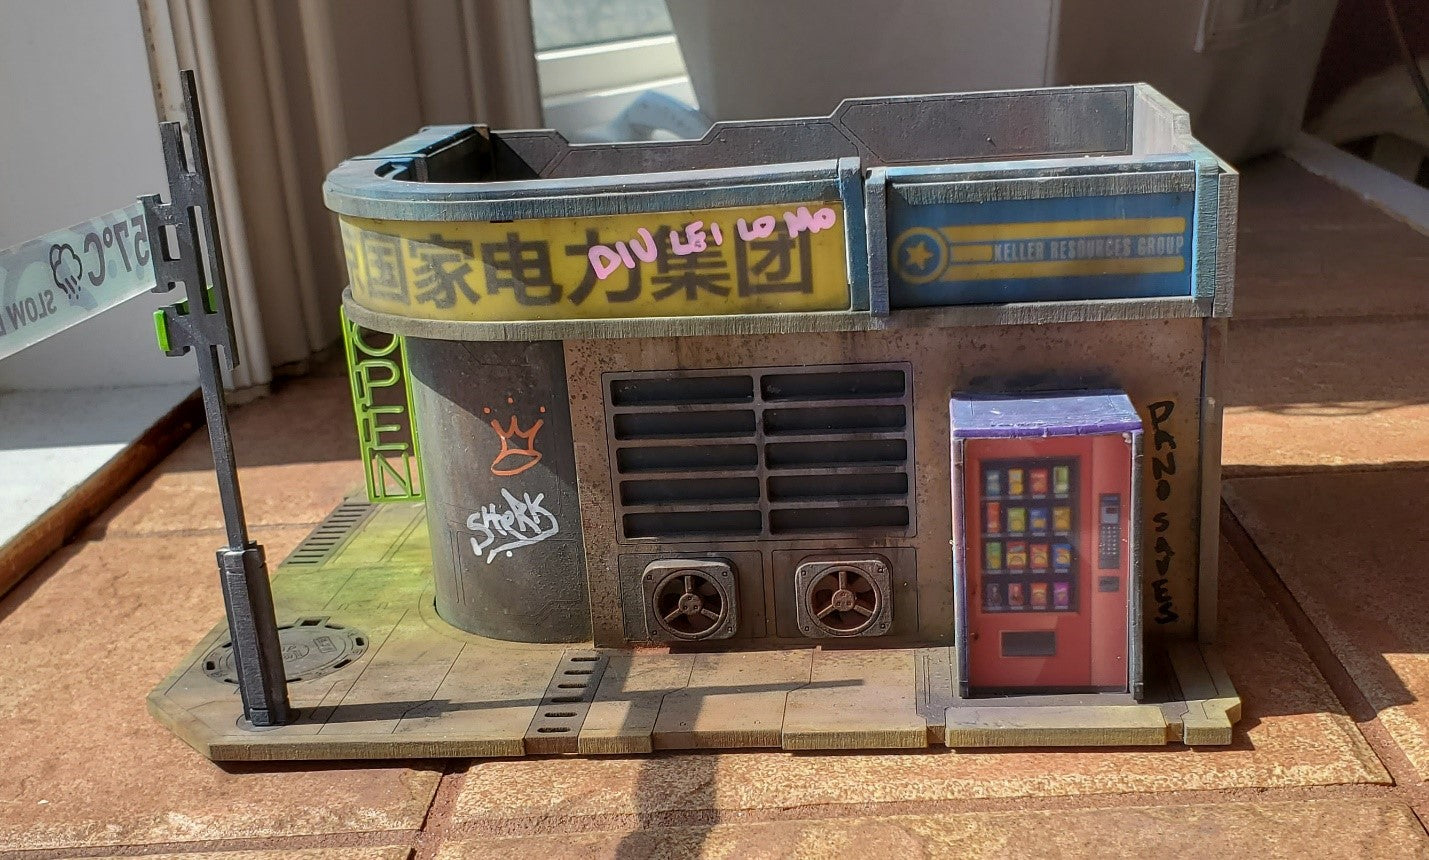
Step 20 – Graffiti and Tagging.


I went to Amazon and looked up HO Scale train graffiti, saved the photos and then printed them on paper. I cut them out with an Exacto knife and apply them to the building using watered-down Modge Podge. Once dry I airbrush the contours of the graffiti with watered-down Scale 75 Inktense Black.
To simulate tags, I use POSCA paint pens. Google Images is your friend here. Find some tags you can do. I also like adding small fluff tags like “PanO Sucks” or “Bostria is King”, or “OK OK OK?”
Step 21 – Seal with Varnish.

If you would like to see more terrain painted by Gianni, check out his Xiguan Clinic.
If you are interested in the Xiguan Shop check it out!
Comments
0 Comments
Leave a Comment